
Ai Content Generator
Ai Picture
Tell Your Story

How to Make a Course on InVastor.com — Step-by-Step Guide for New Instructors
How to Make a Course on InVastor.com — Step-by-Step Guide for New Instructors
Are you ready to share your knowledge, teach your passion, and earn from your expertise?
At InVastor Academy, we’ve made it easy for anyone — educators, professionals, or creators — to design and sell online courses that reach learners around the world.
Whether you want to build a short tutorial or a full educational series, this guide will walk you through how to make a course on InVastor.com, step by step.
Why Create a Course on InVastor?
Before diving into the process, here’s why thousands of creators choose InVastor Academy:
- Global Reach: Your course is instantly accessible to a worldwide audience.
- Revenue Sharing: You earn 40% of every course sale — directly from your expertise.
- InVastor Coins Bonus: Get $100 in InVastor Coins when you publish your first course.
- Simple Tools: No coding or technical skills required — our course builder is beginner-friendly.
- Supportive Community: A dedicated team and a network of fellow instructors are here to support you.
How to Create a Course on InVastor.com
Follow these steps to launch your first course on InVastor Academy.
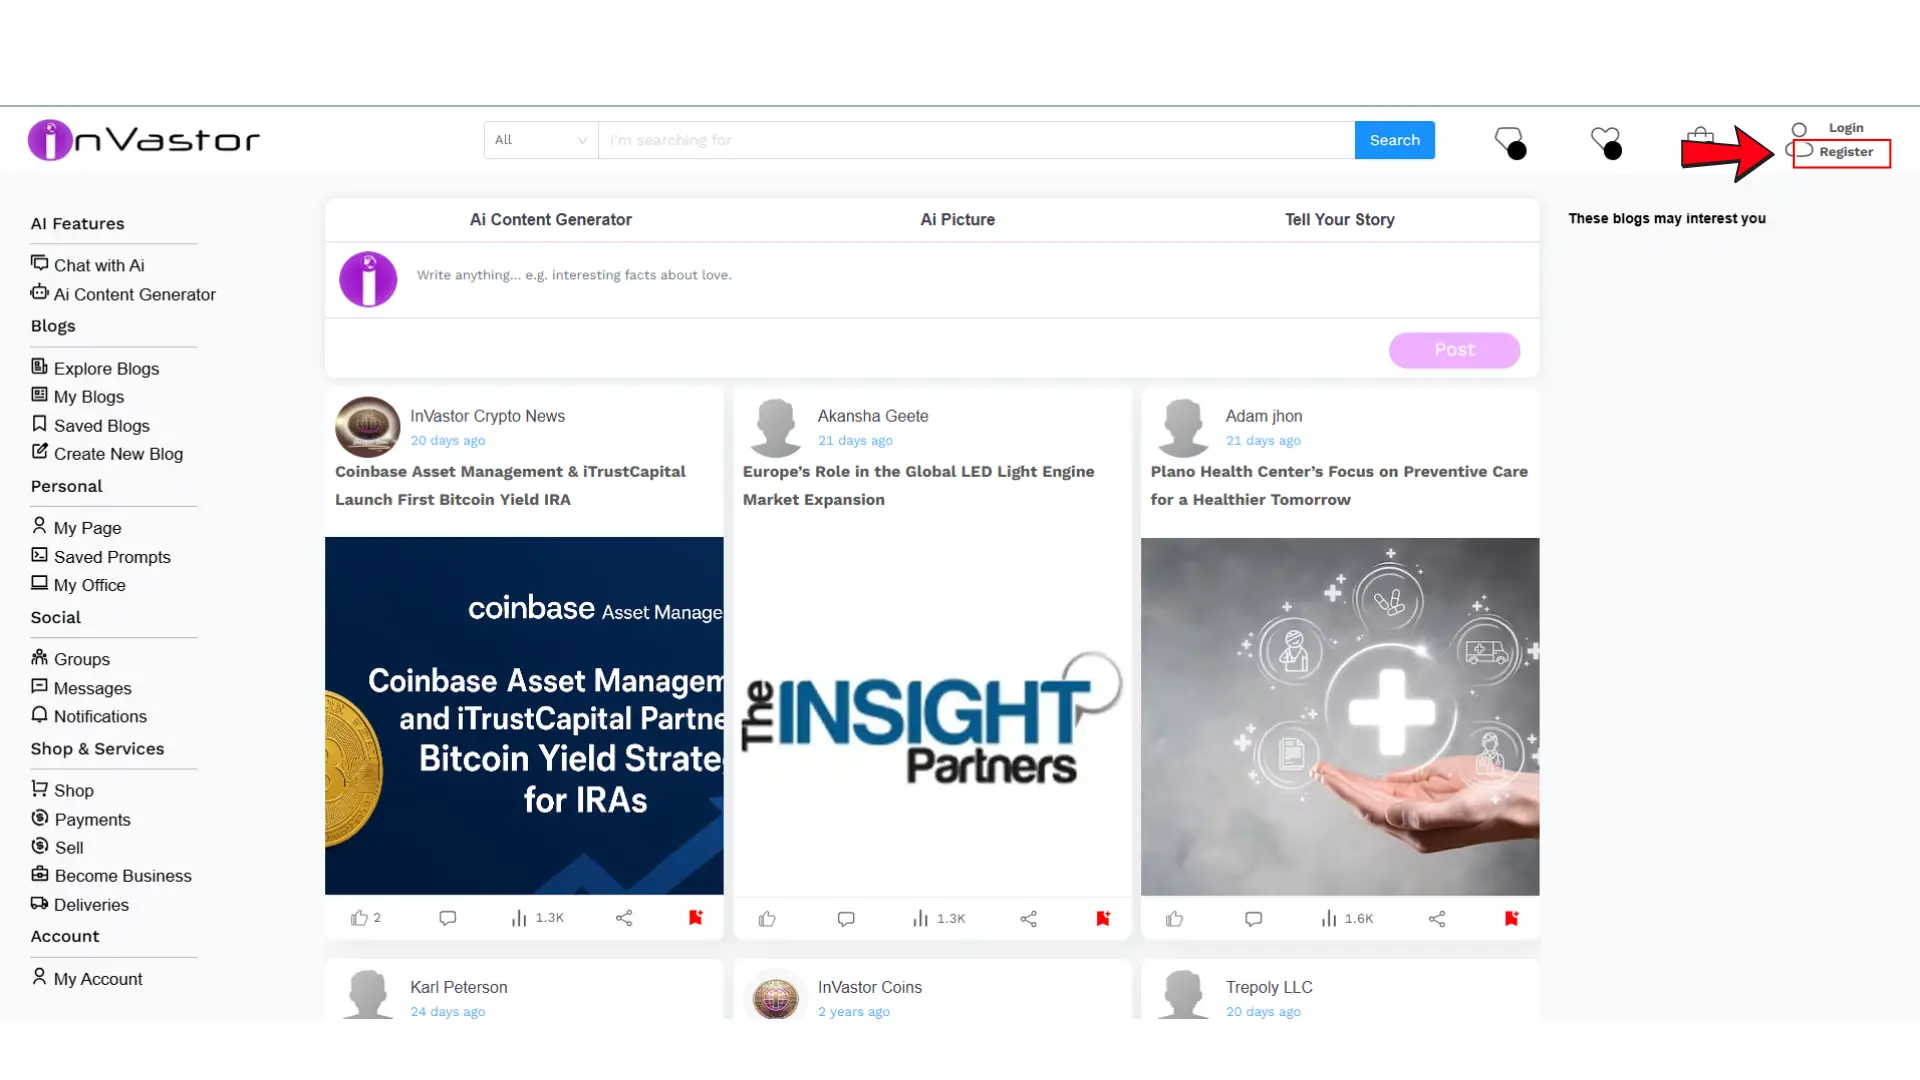
Step 1: Create or Log In to Your InVastor Account
Start by visiting www.invastor.com
If you’re a new user, click "Register" and create your instructor profile. If you already have an account, simply log in using your credentials.
Once logged in, you’ll have access to your Instructor Dashboard, where you can manage your courses, earnings, and performance analytics.
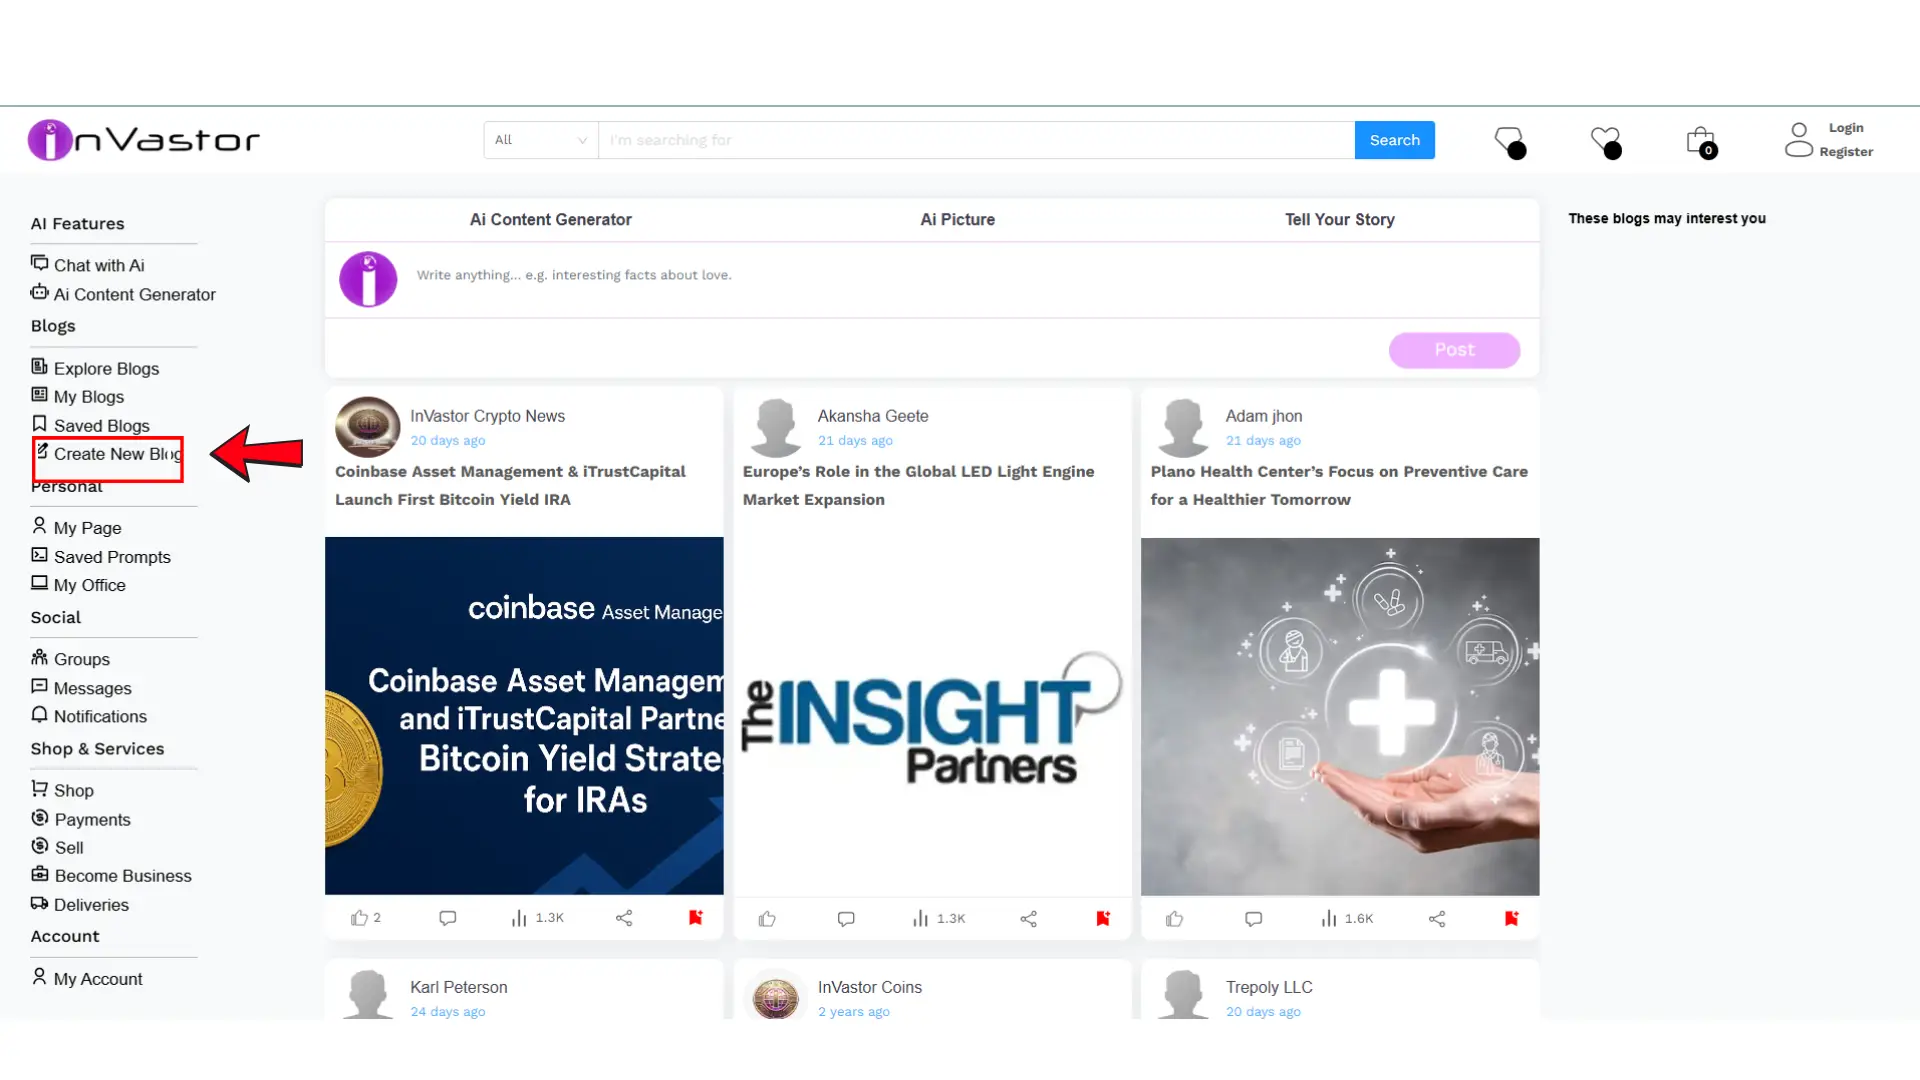
Step 2: Go to “Create New Blog”
InVastor uses a flexible and easy-to-use content creation tool located under Create New Blog.
This is where you’ll build your online course. Think of it as your virtual classroom — you can upload lessons, resources, and multimedia all in one place.
To get there:
- From your dashboard, click Create New Blog.
- Choose a suitable category for your course topic.
- Begin entering your course details.
Step 3: Add Course Details
Your course title and description are the first things students see — make them engaging and informative.
- Course Title: Choose a clear, keyword-rich title. For example, “Mastering Digital Marketing for Beginners” works better than “Marketing Tips.”
- Description: Explain what students will learn, who the course is for, and what outcomes to expect.
- Tags/Keywords: Use relevant keywords (e.g., “online course,” “digital skills,” “leadership training”) to help learners find your course easily.
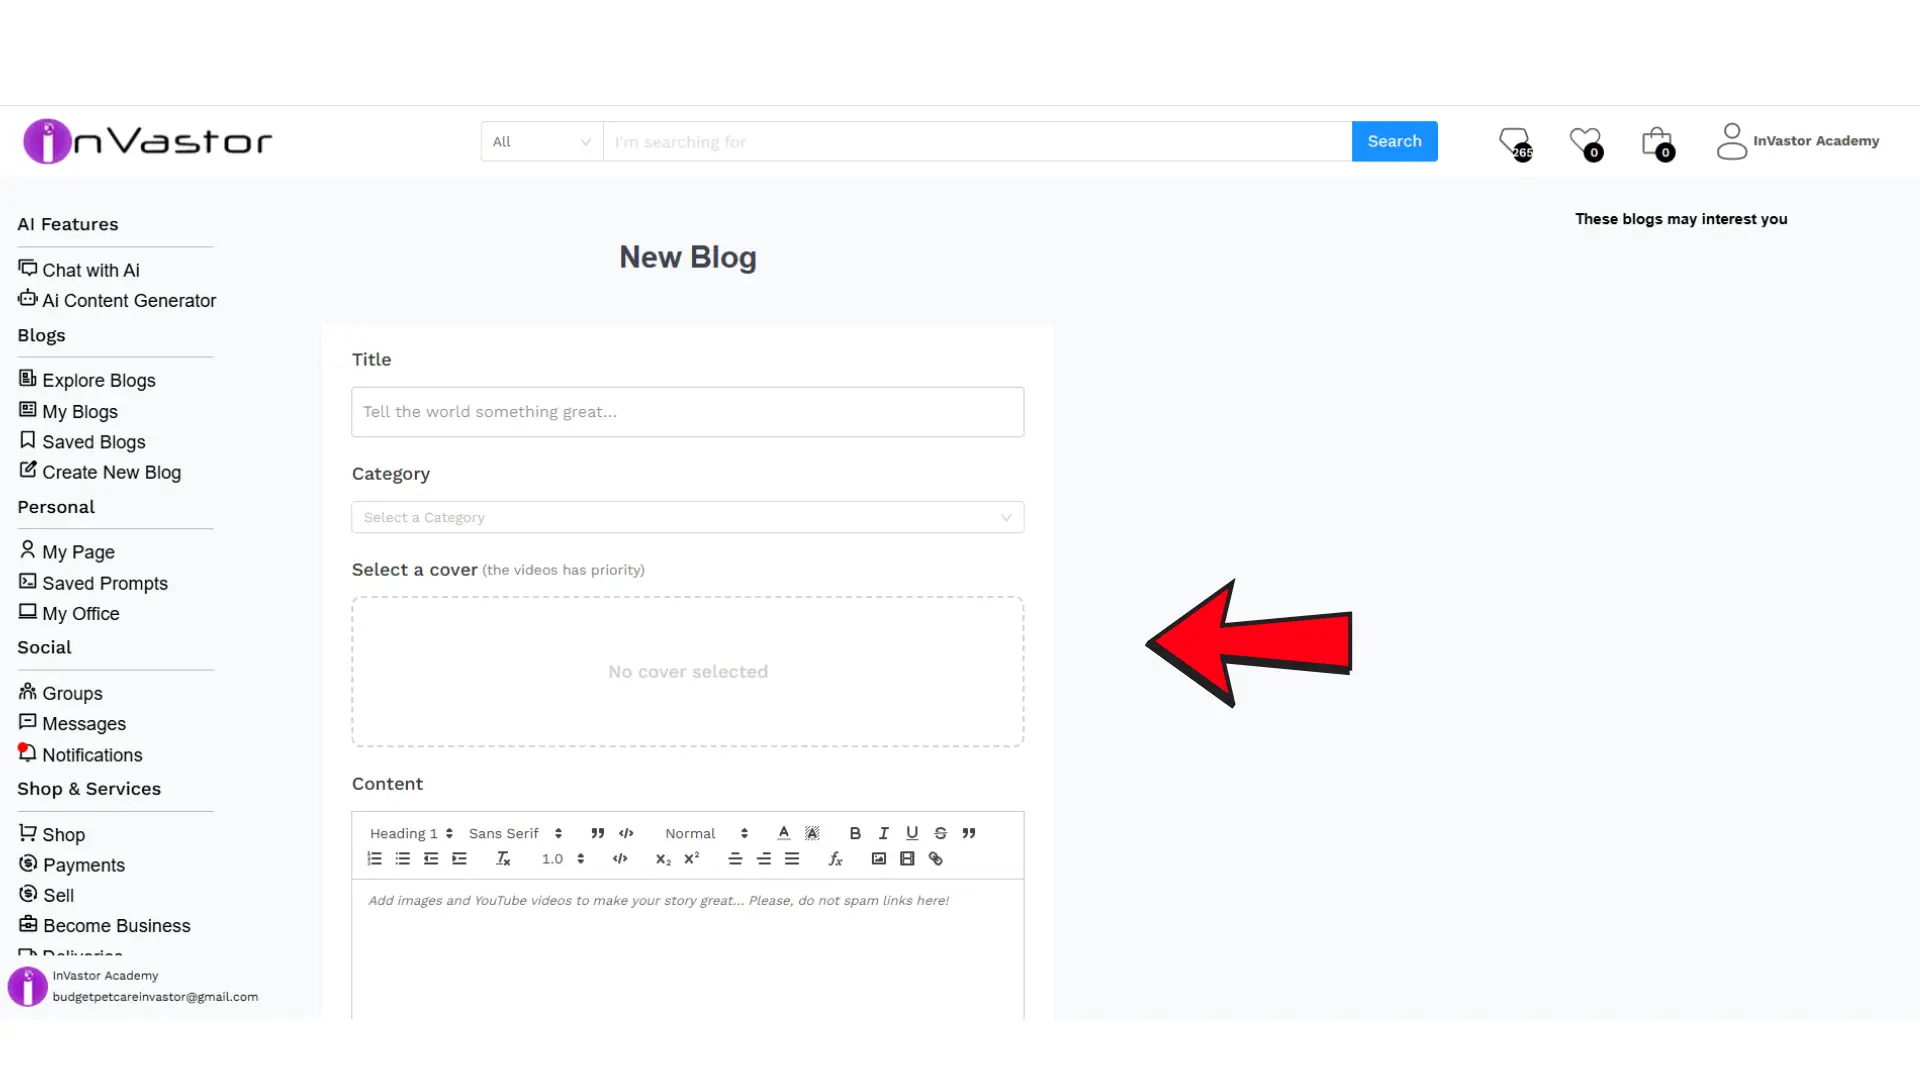
Step 4: Upload Your Course Content
Now comes the creative part — adding your lessons!
You can structure your course into modules or sections, each containing videos, text lessons, or downloadable resources.
Here are some tips for great course content:
- 🎥 Use engaging videos — learners love seeing and hearing from you.
- 🧾 Add supporting materials — slides, notes, templates, or PDFs enhance learning.
- 💬 Include assignments or discussion prompts — encourage learners to interact and apply their knowledge.
You can upload your files directly or embed content from platforms like YouTube or Vimeo.
🧩 Sample Course Example
To get inspired, check out this sample course created on InVastor:
👉 Mastering ChatGPT: From Zero to Advanced Prompts & Applications
This example shows how to structure your lessons, format your content, and present your course effectively to attract learners.
Step 5: Set Your Course Live
Once your course content is uploaded and reviewed, click Publish to make it live.
Your course will now appear on InVastor Academy, ready for students to enroll and learn.
💡 Tip: Double-check your content, title, and cover image before publishing — presentation makes a big difference!
Step 6: Share and Promote Your Course
After publishing, promote your course to your audience to maximize visibility and sales.
Here are a few quick strategies:
- Share your course link on social media (LinkedIn, X, Facebook, Instagram, etc.)
- Add it to your email signature or website.
- Encourage your followers or clients to enroll and leave reviews.
- Remember, the more engagement your course gets, the higher it ranks within InVastor’s discovery system.
Step 7: Earn Rewards and Track Your Progress
Once your first course is live, you’ll automatically receive:
- 🎁 $100 in InVastor Coins as a welcome bonus
- 💰 40% commission on every course sale
- You can track your performance, revenue, and student feedback right from your Instructor Dashboard.
- Use these insights to improve your content and grow your earnings over time.
Step 8: Register as an InVastor Instructor
Before publishing your course, make sure you’re registered as an official InVastor Instructor.
This ensures you receive your earnings, rewards, and full access to the instructor tools.
👉 Complete your registration here:
Instructor Registration Form
🔗 Full URL: https://docs.google.com/forms/d/1uGDTjxxfGc0kZfgQXBcpq9Kj4hyKFXjqUxYqVPXqnbs/edit#responses
Once your form is submitted and approved, you’ll be all set to publish your first course!
Step 9: Get Support Anytime
If you encounter any issues while creating or publishing your course, our friendly support team is ready to help.
📩 Email: support@invastor.com
🌐 Website: www.invastor.com
You can also explore the Instructor Help Center for FAQs and best practices.
🌟 Start Building Your Course Today
Becoming an InVastor Instructor is more than just uploading a course — it’s about sharing your expertise, inspiring learners, and building your personal brand as an educator.
👉 Start creating now: https://www.invastor.com/blog/create-new-blog/
and don’t forget to complete your Instructor Registration Form here:
https://docs.google.com/forms/d/1uGDTjxxfGc0kZfgQXBcpq9Kj4hyKFXjqUxYqVPXqnbs/edit#responses
Your knowledge can change someone’s life — and InVastor Academy is here to help you make that impact.
Related Posts
© 2025 Invastor. All Rights Reserved
User Comments